
If you’re like me, at some point you’ve looked up to the spot where your walls meet your ceiling and had dreams of Victorian grandeur with intricate, wide crown molding covering that ghastly, web-covered corner.
If you’re like me, you’ve also thought, “it is perfectly reasonable that I should have a miter saw to make these angled cuts, and my significant other will totally understand.” Today, you are in luck.
I’m going to explore Miter Saws, their functions, and the best blades to use for what you have in mind. When I’m through, you’ll be armed with just the right information (along with your very best Pinterest pictures of those plastered Victorian-esque moldings) to convince your significant other that you need yet another tool in your inventory.
| Image | Title | Price | Prime | Buy |
|---|---|---|---|---|
Top | DEWALT 12-Inch Miter Saw, 15-Amp, Single Bevel, Compound (DWS715) | PrimeEligible | Buy Now | |
 | TACKLIFE Sliding Compound Miter Saw 12-Inch, 15-Amp, 3800rpm, Double-Bevel Cut (-45°-0°-45°) with Laser Guide, Extensible Table, Dust Bag, 40T 305mm Blade for Wood Cut - PMS03A | Prime | Buy Now | |
 | Delta Power Equipment Corporation S26-263L Shopmaster 10 In. Slide Miter Saw w/Laser (2018) | PrimeEligible | Buy Now | |
 | SKIL 3821-01 12-Inch Quick Mount Compound Miter Saw with Laser | PrimeEligible | Buy Now |
What you can expect to read:
Terminology
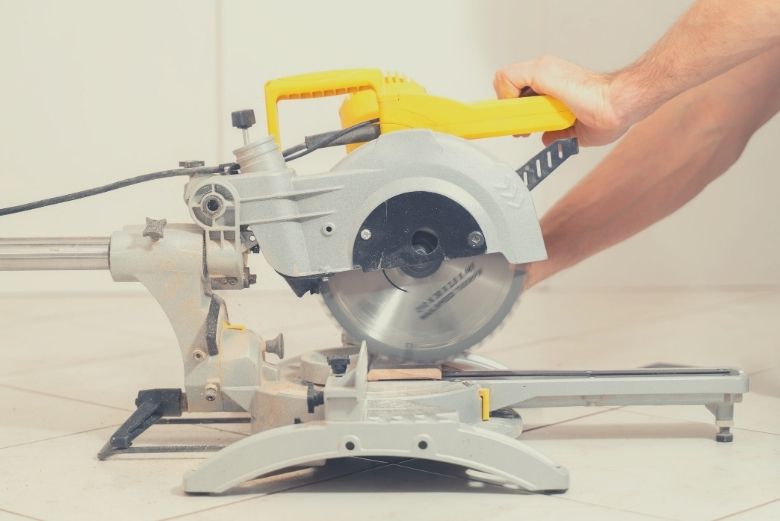
Let’s start out with terminology. First, these saws are NOT Chop Saws. Chop Saws cut only in a 90-degree angle. I’m talking about Miter Saws. Miter Saws are capable of cutting in many different “miters,” i.e., horizontal angles (think left-and-right turning). Some Miter Saws are also capable of cutting Bevels, i.e., vertical angles (think left-and-right tilting). There are Miter Saws, Compound Miter Saws, Sliding Miter Saws, and Sliding Compound Miter Saws.
Miter vs Compound Miter Saw
A Miter Saw is similar to a Chop Saw with the main difference being that a Miter Saw can be adjusted in varying left-to-right angles. These are usually from a negative (left) 50-degree to a positive (right) 50-degree cut, depending on the brand and model.
A Compound Miter Saw is the same as a Miter Saw with the sole difference of being able to also cut a Bevel cut (left-and/or-right tilting of the blade). These bevels can be primarily left-tilt, right-tilt, or both. It all depends on the makeup of the saw and how the motor is positioned. It’s why engineers get paid so well to do what they do. Shout-out to all our engineering friends making our lives better every day.
Sliding vs Non-Sliding Miter Saw
The Miter Saws described above are non-sliding Miter Saws. These cut in a single downward movement, through the material. Sliding Miter Saws also cut in a downward movement, but also, as their name implies, are capable of “sliding” through the material, from back-to-front. Sliding Miter Saws carry the distinct advantage of being able to cut wider material than the blade would normally allow, so naturally, the longer the slide, the wider the cut capability.
Be warned, however, that the longer the slide usually also means the greater area required for the saw to be set up. No resting against the wall for this saw. It needs some elbow room.
What about that crown molding job?
I’m using crown molding in this example because it is the most intricate and difficult trim to install. If you base your Miter Saw purchase on cutting crown molding, it will handle any other trim job you take on, guaranteed.
When it comes to crown molding, you’ll want to start your saw shopping with a vital piece of information: how wide is your molding and at what angle will it be mounted?
The width of crown molding is described as the distance from tip-to-tip, and the thickness is measured at the thickest part of the profile (side view). This means a 1” x 5”, 45-degree crown molding is 1” at its thickest point, and will usually cover an area 3-9/16” down from the wall and across the ceiling.
So, a 5” wide crown molding will NOT cover a 5” area down from the ceiling. This is important, because you need to know the distance from the wall, across to the edge of the molding where it meets the ceiling. Why? I’m glad you asked. Brace yourself.
The easiest way to cut crown molding is to use the “vertical nesting method.” This method allows you to cut your crown molding using only the miter angles, without needing to use bevel angles found in a Compound Miter Saw. This is accomplished by the table of your saw representing the ceiling and the fence representing the wall.
The distance measured from the wall (fence) to the edge of the molding across the “ceiling” (table) at a 45-degree angle will be the minimum cutting length required.
The highest point measured from the ceiling (table) to the edge of the molding along the “wall” (fence) represents the minimum cutting depth required.
It all starts with knowing your ceiling height. If you’re dreaming of a 15-inch high, 12-layer crown for your 8-foot ceiling, please, please don’t. As a rule-of-thumb, for 8-foot ceilings, start with a crown molding that extends anywhere from 2-1/2 to 6 inches down from the ceiling. Add 1/2” to both minimum and maximum measurements for every foot over 8-feet in ceiling height.
The mounting angle, or spring angle, of the chosen molding is dependent on the width of the room and personal taste. You don’t want a crown molding extending deep across the ceiling if you’re standing in a 42-inch hallway. The more shallow the angle, the more vertical the molding. Most US moldings come in 52, 38, and 45-degree angles.
As an example, for a 9’ ceiling height let’s say you choose a 5-5/8” crown molding with a 52-degree mounting angle (aka “spring angle”). This means your ceiling distance (think fence-across-table) is 4-1/8”, and your wall distance (think table-up-fence) is 3-7/8”.
Your minimum depth of cut (vertical) is 3-7/8” (round up to 4”) and your minimum cutting length at 45 degrees (generally the most common cut crossing the maximum amount of material) is 5-13/16” (round up to 6”). Yes, folks. Math is important when cutting trim and in trying to figure out how to get the most bang for your buck. Stay in school, kids.
In this hypothetical case, you’ll need a Miter Saw with at least a 4” cutting depth and a 6” cutting length at the 45-degree angle.
Why is any of this important?
Simple answer: you want to save money; otherwise, you’d hire the job out. You’re a DIY’er and if you can save money on equipment, you can spend it on materials or a nice dinner for your significant other. With the right information in hand, you can choose a saw which will meet all your needs, without buying a Space Shuttle to go to the corner store.
So, while the 12” Sliding Dual-Bevel Compound Miter Saw with the laser guide, espresso maker, and mind-reading capabilities seems like the sexier choice, perhaps it’s not the best choice for the DIY’er.
DeWALT vs Hitachi Miter Saw
The DeWALT


DeWALT has a highly-rated saw, the DW715, 15-amp, 12-inch Single-Bevel, Compound Miter Saw (that’s a mouthful) which would be excellent for our project.
Some of the features I like:
- Positive stops on the miter detent plate, with an override for those tiny adjustments close to the pre-set stops
- Tall sliding fences supporting 5-1/4” vertically nested crown molding and 6-1/2” base molding
- Bevels to the left and right, with positive stops at 0-degrees, 45-degrees, and 33.9-degrees for cutting crown molding lying flat, just in case you feel that burning desire to torture yourself with multiple angle setups
The things I don’t like about the DeWALT:
- Watch the fence coming out of the box. They’ve had some manufacturing issues in the past. Check that the fence is aligned all the way across. It may need to be machined.
- The factory-supplied 40-tooth blade is good for rough cross-cutting, but worthless for trim work. Find a high quality blade and replace the factory supplied.
The Hitachi


Hitachi currently makes a model to suit our needs, as well. The C12RSH2, 15-amp, 12-inch Dual-Bevel, Sliding Compound Miter Saw with Laser Marker provides the needed cutting depths and widths to make our job a breeze.
Some of the features I like:
- HUGE cutting capacities compared to the Dewalt. While the Dewalt meets our needs, the Hitachi exceeds them.
- Short arm swing enables placement closer to a wall in our shop
The things I don’t like about the Hitachi:
- Too many customers complaining about handles being broken coming straight out of the box. This may be a shipping issue or a packaging issue. Either way, it’s too many complaints to ignore.
- The factory-supplied blade is too unwieldy for trim work and will scrape the edge of the slot when beveled. Do we see a trend with factory-supplied blades being junk?
- No lesser models that would meet our needs. Go big or go home, it seems.
- The Hitachi is more expensive
For the money, the DeWALT would be my go-to. Though the Hitachi is a bit beefier, I don’t think it justifies the jump in price.
What about those factory-supplied blades?
Any time we’re talking about blades, there is one simple rule: the more teeth, the finer the cut. Thin blades of at least 60 teeth or better would be used in trim work. Anything less than 60 teeth is inviting too much damage to the material. I prefer 80 teeth in my blades, with very thin kerfs for trim work.
Also, 12-inch blades will tend to “flex” more than 10-inch blades when cutting larger material, i.e., wider molding. A 12-inch saw can accept a 10-inch blade if it suits your project purposes, but a 10-inch saw can’t accept a 12-inch blade, in case that was even a question.
In Conclusion
I like the DeWALT for my saw, and a fine, high-tooth count blade for all our trim-cutting needs. I don’t believe you should have to empty the piggy bank buying the most expensive tools on the market just because they look pretty. Take your time when choosing tools. The money you save can be better used elsewhere. Such as more tools.