
You have a grand idea: “I’m going to lay 24”x24” ceramic tile on my concrete floor.” You grab the thin set and all your best intentions and set to work. Halfway through the project, you place a tile down and it see-saws left and right. The trouble now is that if you mortar it in as-is, it will be higher than the rest of the tiles around it.
It doesn’t necessarily mean you should have used self-leveling compound, though that’s a good start. You may just have a high spot (or three) in your floors, and it may be an easier (and cheaper) fix to simply bring down the high spots closer to the level of the rest of the floor.
And that’s where sanding comes into play. Sure, everyone thinks of wood when talking about sanding floors, but sanding concrete is becoming more en vogue these days. There are a multitude of tools, grits, and techniques to perform this work, and I’m going to cover some of those here, providing you with an assessment of a couple specific sanders along the way.
| Image | Title | Price | Prime | Buy |
|---|---|---|---|---|
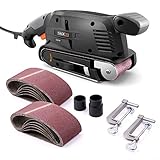 | TACKLIFE Belt Sander 3×18-Inch with 13Pcs Sanding Belts, Bench Sander with Variable-speed Control, Fixed Screw Clamps, Dust Box, Vacuum Adapters, 10Feet (3 meters) Length Power Cord PSFS1A | PrimeEligible | Buy Now | |
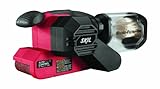 | SKIL 7510-01 Sandcat 6 Amp 3-Inch x 18-Inch Belt Sander with Pressure Control | PrimeEligible | Buy Now | |
Top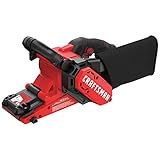 | CRAFTSMAN Belt Sander, 3-Inch x 21-Inch (CMEW213) | PrimeEligible | Buy Now | |
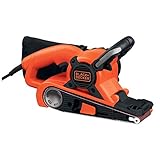 | BLACK+DECKER Belt Sander with Dust Bag, 7-Amp, 3-Inch by 21-Inch (DS321) | PrimeEligible | Buy Now |
What you can expect to read:
Safety guidelines before you get started
Safety first! You can’t DIY if you’re DOA, so make SURE you have these:
Dust Mask – You need a respirator mask rated at N95 or better. A mask which will protect you from harmful silica dust is REQUIRED. There’s no argument here. Holding your breath doesn’t work.
Eye Protection – If you’re in an enclosed space, goggles. If not, safety glasses with side shields to minimize dust exposure. If you wear contacts, TAKE THEM OUT!
Ear Protection – Once it’s gone, hearing cannot be recovered. Protect your ears!
Clothing – long sleeves and pants, and good work boots and gloves go a long way to protecting your skin.
Gather your tools
Sander – Belt, orbital, drum, or palm. Depending on the size of the job, each has its advantages.
Silicon Carbide Sandpaper or Diamond Disc for an orbital sander – It is VERY important to use silicon carbide sandpaper rated for both wet and dry applications. Just any old sandpaper won’t do. 40-60 grit sandpaper is good for general stripping. 80-120 grit for removing fine imperfections. 200+ if you’re looking to go sock-skating across the floor later. Diamond discs also come in varying grits. Ask yourself, “how much do I want to remove, and how smooth do I want it to be?” Start in the low numbers and work your way up to the finish you’re wanting.
Shop-Vac with HEPA or High Efficiency filter bag rated for fine dust and drywall dust. This particular tool is worth its weight in gold, so don’t pass it by!
Clear plastic drop cloths.
Spray bottle or pump-up sprayer with clean water.
Abrasive Cleaning Stick for extending the life of your sandpaper.
24” or longer level, or straight edge
Prep the area – Small High Spot
If you’re only working a small space, cover the surrounding furniture with a drop cloth. If you have multiple spots across the room, remove everything, or at least move to one side and cover it completely.
Sweep or vacuum the area to be sanded. Remove any particulates in the area. This makes for a better run for the sander.
Using the level or straight edge (turned up on edge), identify the high spot in the floor. Lightly mark where you want to sand. Use a #2 pencil and lightly draw a box around the area. This will help you stay focused on the high spot and not “drift” too far.
Connect the Shop Vac to the Sander. Turn on the Shop Vac.
Spray the area well with a light mist of water. Don’t puddle it up, just use a light mist. This will help keep the dust down.
Start sanding
Using a 40-60 grit silicon carbide belt and working from left to right, move the sander across the area in sections. DO NOT press down, or “lay” on the sander. Its weight is sufficient to do the work. Be patient. Overlap successive passes by one-half the sander’s length until you’ve sanded the area completely. Work from the farthest spot away and then back towards you.
After the initial pass has covered the area in question, you’ll need to sweep or vacuum the spot to remove any remaining dust and/or particulates.
Check the level between the spot being sanded and the surrounding floor. Check in at least four directions. Think North-South, East-West, Northeast-Southwest, Northwest-Southeast.
Use the Abrasive Cleaning Stick to clean the belt on the sander.
Repeat until the high spot has been removed.
So which tool should I choose?
For smaller jobs, belt sanders are best, with palm sanders playing a close second. These remove less material and generally allow you to smooth the concrete floor without getting to the aggregate within the slab.
For larger jobs, or if you’re not concerned with aggregate showing in the finish, drum sanders or orbital sanders with diamond discs may be your choice. These can generally be rented. Take note, the more material being removed, the more dust will be generated. These larger machines can overload a simple Shop Vac, so if you rent one, spend the extra money and rent the industrial strength vacuum to go along with it. You’ll be glad you did.
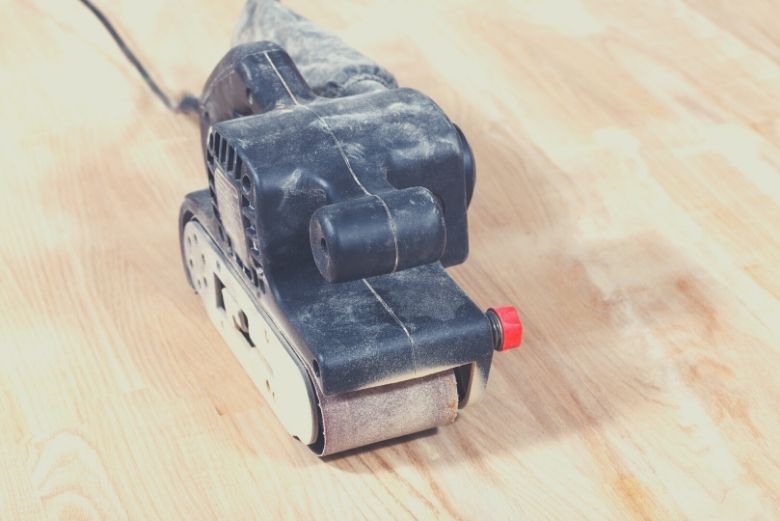
Belt Sanders
The most common belt sanders are 3” in width and come in 18” and 21” lengths. The 3”x18” model would be considered Light Duty and the 3”x21” model would be Medium Duty. There is also a 4”x 24” which would be considered Heavy Duty. As you can imagine, the longer and wider the sander, the heavier it is, so choose according to your ability.
Undoubtedly, the best belt sander for concrete would be a Heavy Duty. A Medium Duty would work, but be prepared to have a greater amount of patience. An advantage to having a Medium Duty is its versatility in also being one of the best belt sanders for general woodworking. Unless you’re sanding logs into baseball bats, in which case a Heavy Duty might suit you well!
The Best Belt Sander for Concrete


For the money, the best belt sander for concrete would be the Porter Cable 362V 4”x24” Variable Speed Belt Sander. This beauty weighs in at 15.5 pounds and roars with a 12 amp motor pushing belt speeds up to 1500 ft/min. The heavier weight and faster speeds means less time on your hands and knees making rough places smooth. One drawback is the upward-facing dust ejection port, making connecting and keeping the vacuum hose a bit tedious. It does come with its own dust collection bag, but we enjoy the use of the vacuum. It’s on the higher end of the options, but if you’re looking to remove more material in less time, this is your baby.
The Best Belt Sander for Woodworking


If I can briefly step away from concrete and discuss woodworking, the best belt sander would be the Makita 9903 3”x21” Variable Speed Belt Sander. Its 8.8 amp motor is connected to an electronic speed control which keeps it from bogging down under load, a common issue with cheaper belt sanders. Good balance and an extended base means you can get right up next to the wall if you’re sanding a wood or concrete floor. Finally, its auto-tracking belt system will usually track the belt without you having to fiddle with it, a time saver for sure. I also like the rear-facing dust ejection, meaning the vacuum hose is more in line with the handle and not sticking up in your face while you’re working. It’s well worth the money and should give you years of service.
Other Sanders
Palm sanders would be okay for concrete jobs but are very, very light duty. These are normally reserved for scoring concrete floors in very tight places in preparation of applying a finish (such as an acid wash or stain). If you have to have maximum control in a tight spot, a palm sander is perfect. Same rules apply as to the type and grit of sandpaper. Also, don’t press down or “lay” on the tool. A little pressure is all that’s needed. Patience.
Drum sanders are usually rented and you’ll need a friend to put it in or take it out of the truck. They’re bulky and heavy, but they’re meant to remove material in a large area. You’ll use a drum sander if you’re working on a large common area or an entire basement. The draw back to a drum sander is the lack of maneuverability. They go in straight lines, and they don’t like turns. You’ll be using this tool like a push lawn mower, moving in straight lines across the room and overlapping each pass by no more than one-third the width of the drum sander. You can’t get super close to the walls, but that’s where your Belt and Palm sanders come into play. Drum Sanders make a TON of dust, so if you rent one, also get the vacuum to go along with it, or be prepared to use copious amounts of water on the concrete to keep the dust down.
Orbital sanders, like Drum Sanders, also create a large amount of dust. These operate more like a floor buffer, meaning they float on a circular disc and the operator presses down or lifts up on the handle slightly to control the movement. Be careful, these babies can get away from you quick! They are generally used with diamond discs and it is best to use a significant amount of water on the concrete floor to control the dust. Cover the lower part of walls and enclose interior door openings with clear drop cloths to protect surfaces and keep dust from migrating through the house. Use belt and palm sanders for close-to-wall and corner work.
In Conclusion
Overall, I enjoy my belt sanders for both concrete floors and woodworking. While most other sanders are used almost exclusively on wood or concrete, belt sanders are the versatile bridge between the worlds. No DIY’er should be without at least one. Or two. Or six.