

When my father taught me how to use a table saw as a kid, he explained how all the parts worked together so we could professionally rip a board for our DIY projects. In learning how it worked, I gained a respect for tool and always treated it knowing its dangers. I never took a shortcut or varied from what my father taught me.
Knowing how the tool works and following basic guidelines will keep you and any fellow DIYER safe with not only a table saw but any tool you’re working with. I’ll recommend my best picks for table saws, explain some basic terminology, and explain the two types of cuts.
| Image | Title | Price | Prime | Buy |
|---|---|---|---|---|
Top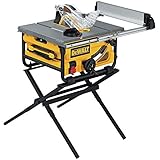 | DEWALT DW745S Compact Job Site Table Saw with Folding Stand | PrimeEligible | Buy Now | |
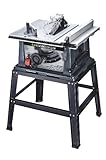
 | SKIL 3410-02 10-Inch Table Saw with Folding Stand | PrimeEligible | Buy Now | |
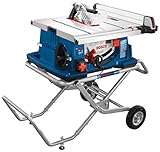 | Bosch Power Tools 4100-10 Tablesaw - 10 Inch Jobsite Table Saw with 25 Inch Cutting Capacity and Portable Folding Table Stand | PrimeEligible | Buy Now | |
 | Genesis GTS10SB 10-Inch 15-Amp Table Saw with Stand | PrimeEligible | Buy Now |
What you can expect to read:
What to Look for in a Table Saw
- Motor with 15 amps or 1 3/4 HP
- A high quality, front locking, T Square fence that stays parallel to the blade
- Standard size miter gauge slots of 3/4″. This allows a future upgrade path for after market miter gauges.
- General purpose 32 tooth blade should be all you need for the majority of your cuts
The Best Table Saw for a DIYER


The DeWALT 10-Inch Jobsite Table Saw combines what most DIYers need at a very affordable price. First off, the 15amp motor will give plenty of juice to rip boards all day long. I like this saw because it also comes with a rolling stand for portability. Most DIYer’s won’t have a dedicated work area and may need to roll a tool of this size outside to work on larger pieces and this one fits the bill. It’s simple to setup in about an hour when you follow the well diagrammed pictures and instructions in the manual. If you stick with DeWALT, stay with the 7491 over the 7480 as the 7480 uses a different miter track which may not work with after markets. It also has a more shallow feed in depth compared to the 7491 which has a total of 7.5″ feed in depth. The extra depth will help you avoid kickbacks as your board can better align with the fence as you push it.
Features
- 15 amp motor
- 32 1/2″ rip capacity
- Cut depth of 3 1/8″ @ 90 degrees
- Portable stand
- 3 year warranty
- Includes push stick, 24 tooth blade, miter gauge, rip fence, blade wrenches, riving knife
The Next Best Table Saw


I really like the Bosch 10-Inch Portable Worksite Table Saw because it delivers a high value for what it is. It’s easy to use, easy to store, and very rugged. One drawback however is that you can’t use an auxiliary fence on the included miter gauge. You’d have to drill 2 holes into it if you wanted to mount your own. Not a big deal if you’re going to get an aftermarket miter gauge anyways.
Features
- 15 amp, 4HP motor
- 25″ rip capacity
- Cut depth of 3 1/8″ @ 90 degrees
- Portable stand
- 1 year warranty
- Includes stand, 10″ blade, rip fence, push stick, throat plate insert, 2 wrenches
The “I’m on a Budget” Option


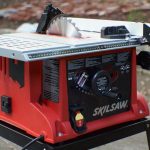
If you don’t have a lot of money to spend, the SKIL 10-Inch Table Saw may be a decent option for you but not my favorite. While it’ll surely rip boards for you, it may lack quality of other brands. You’ll find more plastic used in the construction of the handles and other parts. The vertical adjustment can wobble a little bit and you may have to realign the blade when you first receive it. The miter may be a little loose as well. For basic and quick cuts at a cheap price, the SKIL will work in a pinch but not recommended for refined pieces or high end woodworking. If you’re a DIYer and working on small home projects, it should do fine.
Features
- 15 amp motor
- 24 1/4″ rip capacity
- Cut depth of 3 1/2″ @ 90 degrees
- Portable stand
- 3 year warranty with registration
- Includes stand, carbide blade, rip fence, miter gauge, 2 wrenches
Parts of the Table Saw
- Rip fence – A quality fence will lock at the front of the saw creating a guide to cut your board exactly parallel to the blade as you push it through.
- Ripping – When you cut along the length of the wood to your measured width
- Dado – When you cut a notch without going all the way through the wood
- Riving knife – A safety device that will raise and lower with the blade. It keeps the cut boards separated as it goes through the blade to prevent binding, jamming, and kickback which can be potentially fatal. Never remove this.
- Safety guide – Another safety device to keep you from accidentally reaching over and onto the blade. It can also help to prevent kickback.
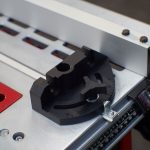
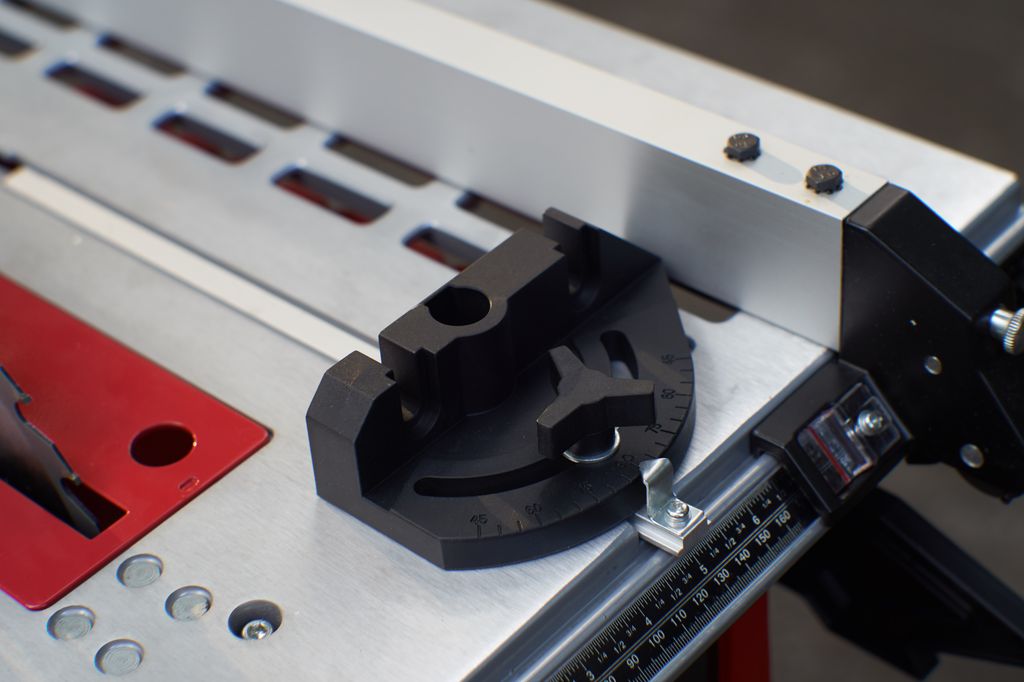
- Miter gauge – Similar to a rip fence but it’s used to make cross cuts. Used this most often at 90 degrees. Can pivot to make angled miter cuts.
- Outboard table – A table that sits on the outside of the saw to support longer pieces
- Push stick or push pad – A safety device used to push the board through the saw without jeopardizing the safety of your hands and fingers
- Kerf – The width of the area cut by the blade itself
- Kickback – When the wood forcefully ejects because it binds in the blade
The Two Types of Cuts
- Rip Cut – Your cut goes along the grain of the board to your measured width
- Cross Cut – Your cut goes across the grain of the board to your measured length
Before you Cut
- Use a square to make sure your blade is perfectly perpendicular to the table
- Measure the blade itself and not the kerf or width of the teeth
- Make sure your rip fence is perfectly parallel to the saw blade
- Always stand to the side of the board, never directly behind
- Always wear safety glasses and ears
- Never freehand cut without the rip fence or miter gauge
How to Make a Rip Cut
- First set your rip fence to your desired measurement and lock it down
- Adjust the height of the blade to be just above the height of the board
- Turn on the saw and make your cut
- Keep your eyes on the fence to make sure the board remains parallel as you push it
- Use a push stick or push pad when you approach the blade
How to make a Cross Cut
- If you don’t have an aftermarket miter gauge, you can make your own auxiliary fence. Cut a piece of wood and using screws attach it to the miter gauge. This will give you a better surface to cut with.
- Put your board along the length of the auxiliary fence and push through the saw.
How to cut multiple pieces to the same length
- A stop block is a small piece of wood that you can attach to your auxiliary fence to create a predefined length
- Put the end of your board against the stop block and make the cut
- Continue with the next piece and all pieces will be the same length
Additional Resources
Some great tips and hacks on the table saw from WoodWorkWeb