
If there’s one subject almost all DIY’ers cringe at hearing, it’s painting. Whether talking about the general slop-around brushing, rolling, or *shudder* spraying, the work can seem intimidating and cause general horror and mayhem in the minds of the most stoic DIY’ers. We’re going to break down the process and hopefully ease some of the tension surrounding the work.
| Image | Title | Price | Prime | Buy |
|---|---|---|---|---|
Top | Wagner Spraytech 0518050 Control Spray Double Duty HVLP Paint or Stain Sprayer, Complete Adjustability for Decks, Cabinets, Furniture and Woodworking, Applies thin materials such as stains, sealers, urethanes, varnishes and lacquers. | PrimeEligible | Buy Now | |
 | REXBETI Ultimate-750 Paint Sprayer, 500 Watt High Power HVLP Home Electric Spray Gun, 3 Nozzle Sizes, Lightweight, Easy Spraying and Cleaning | PrimeEligible | Buy Now | |
 | HomeRight C800971.A Super Finish Max Extra Power Painter, Home Sprayer HVLP Spray Gun for Painting Projects, Blue | PrimeEligible | Buy Now | |
 | Paint Sprayer,Tacklife SGP15AC Electric Paint Spray Gun, 3 Spraying Patts, 900 ml Paint Container, Easy-Used for Painting Projectserns with 4 Nozzle | PrimeEligible | Buy Now |
What you can expect to read:
First, we prepare the work area
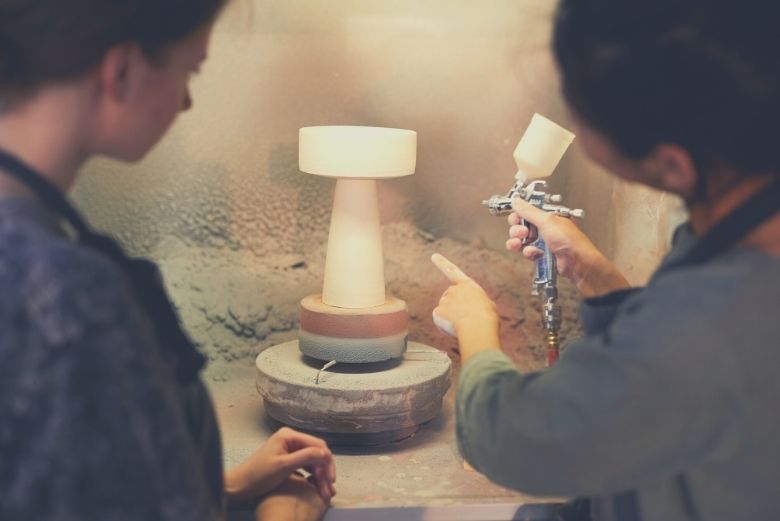
Let’s begin with the setup. If you’re painting furniture in your garage or outside (we highly recommend outside for the best ventilation), you’ll need to cover the area with a drop cloth. You don’t want that beautiful fescue marred with a large patch of Robin Egg Blue #332. Weigh down the corners and at intervals along the sides with bricks or large(ish) stones; basically, whatever you have available that you won’t mind having a hint of Robin Egg Blue on the finish. The larger the area covered, the more comfortable you’ll be in expressing your inner Warhol. If you’re close to your house, or the wind is blowing into your garage, it’s a good idea to extend the drop cloth vertically on the opposite side of the work area, just in case a rogue wind catches some overspray and attempts to use it to Picasso your garage wall.
Next, we prepare our bodies
Ventilation. You need it and your work needs it. But even with the best ventilation, you have to protect your lungs. You’ll need a mask rated for paint fumes. We like the 3M Paint Project Respirator, Medium. It’s rated OV and P95, meaning it’s perfect for general organic compounds and paint spraying. With interchangeable/replaceable cartridges, this is a respirator which will serve you well in all your DIY pursuits. The cost is around $35, and the cartridges are around $18. We ask you: which is cheaper: a $35 respirator or a lung transplant. We thought so, too.
Eye protection. You may want baby blues like Ol’ Blue Eyes, himself, but spray painting isn’t the way to go about it. You’ll need to protect your baby browns, and we like the Dewalt DPG82-11 CTR Concealer Clear Anti-Fog Dual Mold Safety Goggles. They’re lightweight, have anti-fog lenses, and conform to your face, preventing accidental overspray from working its way around the edges into your peepers. Best of all, they have replaceable lenses, so if the tough lenses eventually get scratched up, you can just get another set in there lickity-split.
Clothing. You’ll likely not have your Sunday best on while performing this project, but even so, you’ll want to have your exposed skin covered. Cleanup becomes much easier when you’re not covered in paint. Wear a disposable overall suit like the Buffalo Industries brand of disposable coveralls. They’re only a few dollars, and the time saved in cleaning yourself up afterwards will be well worth the cost. Add to this a set of gloves of the nitrile variety for painting. You won’t be picking paint out of your fingernails two weeks later if you follow this simple step. We find the 6 mil to be best.
Hydrate. You’re going to be painting in an overall suit with a mask and gloves. Drink plenty of water before you start.
Now, we prepare the furniture
First, what needs repair? Are there broken legs or drawer slides which need securing before you begin? If so, tackle those things first and foremost. It’s much easier to paint a finished project than trying to touch up large spots later.
Sand around dents and holes, splits and cracks with a coarse-grit sandpaper (usually around a 40 grit is fine. Apply copious amounts of STAINABLE/PAINTABLE Wood Filler (not just any wood putty) and generally smooth. Leave some slightly mounded atop the dent/hole or split/crack. As it dries, it will contract some. Once completely dry, sand the areas smooth with 220-grit sandpaper, followed by 320-grit sandpaper.
Now, remove all the hardware. Turn it over. Look for metal feet or legs. Leave drawer slides in, if you wish, but at least take the time to cover any rotating parts with a piece of painter’s tape.
Next, lightly sand the ENTIRE area to be painted with 220-grit sandpaper. The fine marks left by the sandpaper give the paint something on which to hold. You don’t have to spend forever doing this, but know this: skipping this step WILL lead to flaking paint later. Don’t skip it. Seriously. Don’t skip it. We mean it.
Moving on, we’re going to degrease and degloss the piece. Using Trisodium Phosphate (TSP) – found at any big-box hardware store – mix a few teaspoons in a spray bottle of water. Spray the piece and use a clean, lint-free cloth (like an old T-Shirt) to wipe down thoroughly. Get every nook and cranny. Clean the interior and the exterior. Get it clean as a whistle.
Finally, tape off any areas you don’t wish to paint. If you’ve got some grand design to paint multi-colored stripes, or having a trim area painted a different color, cover those areas.
Helpful tip: If you’re going to be painting the trim molding a different color, start your painting project there. In essence, paint the trim area first. Don’t worry about taping around the edges of the trim. Just paint it as described below. Once it is dried COMPLETELY, cover the trim with Frog Tape (we love our Frog Tape) before painting the entire piece. This technique removes the stress of painting fine areas.
Now, we prepare the sprayer
Set up the sprayer according to the instructions. For this project, we’re going to begin with a solid primer, then the finish coat. We cannot stress enough the importance of using a solid primer coat. Light gray works best with every color out there, including white. Some may say, “you don’t need it every time,” but as a good rule of thumb, just get in the habit of using a primer. It will add another layer of protection for not only the piece, but also the finish coat.
Fill the sprayer with a blend of primer and thinner. Different primers use different thinners, some water, some paint thinner. In either case, most primers and paints are too thick for paint sprayers, so thinning becomes essential.
We’ll use Kilz Primer on our project. Open one gallon can of Kilz Primer and stir thoroughly, ensuring no watery residue remains on top of the paint.
Remove 2 to 3 cups (measured) of Primer and place in a container with a securable lid.
Add 1-1/2 to 2 cups of water to the can of Kilz. Using a wire whisk, stir thoroughly until it’s all smooth.
Load the paint sprayer according to the instructions, returning the lid to the can of Kilz when not in use.
Add the 2 to 3 cups of primer removed earlier back to the can of Kilz. Add 1 to 1-1/2 ounces of water and stir with a wire whisk. You now have a blended and thinned gallon of primer for your paint sprayer.
Now, we paint the piece
Using wide, steady strokes pass the sprayer across a scrap of plywood or drywall. View the effect. Do you need to get closer or farther away? Do you need to adjust your technique?
- If you see runs, you’re too close or you’re moving the sprayer too slowly across the piece.
- If you see more material showing through than paint where you sprayed, you’re too far away or moving too quickly across the surface.
- If you see thick paint at the ends and less in the middle, you’re pausing your motion at the start and end of the pass.
- If you see thicker paint in the middle and less at the ends, you’re moving in an arc instead of keeping the sprayer an equal distance from the piece throughout the pass.
Adjust your technique and make several practice runs. When you’re comfortable, paint the piece.
Turn the piece over and paint the bottom first. It may seem unusual, but it actually will prevent a common issue with DIY paint projects: lines along the edges at the bottom of a piece of furniture. The contrasting colors will show up. If you want quality, deliver quality. First the primer, then the finish coat.
Once dry, turn it right side up and paint the remainder of the piece, inside first, then outside. Use short, steady strokes for tight areas, and longer, smoother strokes for wider areas. Begin your spray outside the edge of the piece and end the spray after you’ve passed the opposite edge. Keep that distance equal! First the primer, then the finish coat.
Clean the sprayer thoroughly according to the directions between the coats of primer and paint. It is a lot of work, but it’s worth it.
What paint sprayer do we like for furniture?


We like the Wagner 0518080 Control Spray Max HVLP Paint Sprayer. It has 3 spray patterns and you can adjust the speed of the flow coming out. It can spray stains, sealers, and interior latex. If you are spraying latex, you may want to thin it first so you get a better application.
In conclusion
Painting may seem daunting, but if you take it a piece at a time, you’ll find it’s much easier than your friends tell you. Find your zone and enjoy the transformation of bringing color to your world!